Your Complete BLS Pre-Course Study Guide: Essential Skills for Life-Saving Certification
Comprehensive Preparation Resource by Pulse CPR and First Aid School – Martinez, GA | (706) 901-7277
Master BLS Skills Before Your Certification Course
Basic Life Support (BLS) certification is one of the most valuable skills you can learn, whether you’re a healthcare professional, first responder, or someone who wants to be prepared for emergencies. This comprehensive study guide covers all the essential knowledge you’ll need to succeed in your BLS certification class and confidently perform life-saving techniques when they matter most.
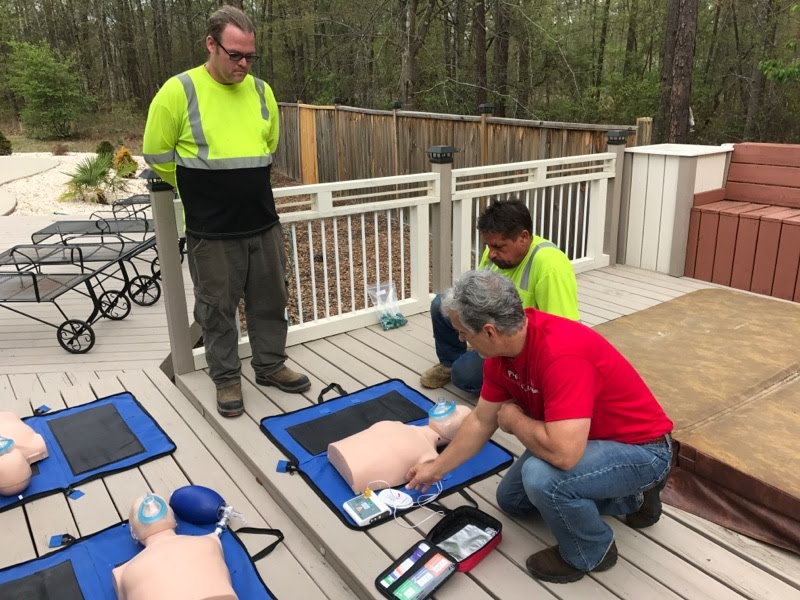
The American Heart Association’s BLS course trains participants to promptly recognize life-threatening emergencies, deliver high-quality chest compressions, provide appropriate ventilations, and use an AED effectively. These core skills form the foundation of emergency response and could mean the difference between life and death in a cardiac arrest situation.
Who Needs BLS Certification?
BLS certification is required for healthcare providers including nurses, doctors, EMTs, paramedics, dental professionals, physical therapists, and healthcare support staff. It’s also valuable for childcare providers, fitness trainers, coaches, teachers, and anyone who wants comprehensive life-saving skills. Many employers require current BLS certification as a condition of employment.
Adult CPR: The Foundation of Basic Life Support
Recognizing Cardiac Arrest
The first critical step in any emergency response is proper assessment. You must quickly and accurately determine if someone needs CPR by systematically checking for responsiveness and normal breathing.
Check for Responsiveness:
- Tap the person’s shoulders firmly while shouting “Are you okay?”
- Look for any verbal response, movement, or eye opening
- If unresponsive, immediately call 911 or have someone else call
Assess Breathing:
- Look for normal chest rise and fall for no more than 10 seconds
- Listen for breath sounds
- Abnormal gasping or agonal breathing is NOT normal breathing
- If no normal breathing is present, begin CPR immediately
Pulse Check (Healthcare Providers Only):
- Check the carotid pulse for no more than 10 seconds
- Locate pulse by placing fingers on the side of the neck, next to the windpipe
- If no pulse is felt or you’re uncertain, begin CPR immediately
- Lay rescuers should NOT check for pulse – start CPR if victim is unresponsive and not breathing normally
High-Quality Adult CPR Technique
Proper Hand Placement:
- Place the heel of one hand on the lower half of the breastbone (sternum)
- Place your other hand on top, interlacing your fingers
- Keep your arms straight and position your shoulders directly over your hands
- Avoid placing hands over the ribs, upper chest, or bottom of the breastbone
Compression Technique:
- Depth: At least 2 inches (5 cm) but no more than 2.4 inches (6 cm)
- Rate: 100-120 compressions per minute (think “Stayin’ Alive” tempo)
- Complete Recoil: Allow the chest to return to its normal position between compressions
- Minimize Interruptions: Limit pauses to less than 10 seconds
Rescue Breathing:
- Use head-tilt, chin-lift maneuver to open the airway
- Tilt the head back by lifting the chin and pushing down on the forehead
- Create a complete seal over the victim’s mouth with your barrier device or mask
- Give 2 breaths, each lasting 1 second
- Watch for visible chest rise with each breath
- If chest doesn’t rise, reposition the airway and try again
Compression-to-Ventilation Ratio:
- 30 compressions to 2 breaths for both single and two-rescuer CPR
- Complete 5 full cycles (30:2) before checking rhythm or pulse
- Switch compressors every 2 minutes to prevent fatigue and maintain quality
Sample Adult CPR Questions
Question 1: What is the correct compression depth for adult CPR? a) 1-1.5 inches
b) At least 2 inches but no more than 2.4 inches
c) 2.5-3 inches
d) As deep as possible
Answer: b) At least 2 inches but no more than 2.4 inches
Question 2: What is the compression-to-ventilation ratio for adult CPR? a) 15:2
b) 30:2
c) 5:1
d) 15:1
Answer: b) 30:2
Pediatric CPR: Modified Techniques for Children and Infants
Understanding Age Categories
Proper age classification is crucial because CPR techniques vary significantly between age groups:
Child: 1 year to puberty (onset of secondary sexual characteristics) Infant: Birth to 1 year (excluding newborns in delivery room setting)
Child CPR (1 Year to Puberty)
Assessment Differences:
- Children often experience cardiac arrest due to respiratory problems rather than primary cardiac issues
- Check carotid or femoral pulse for no more than 10 seconds
- Look for responsiveness appropriate to the child’s developmental level
Modified CPR Technique:
- Hand Placement: Same as adult – lower half of breastbone
- Compression Method: Use one or two hands depending on the child’s size
- Compression Depth: At least one-third the depth of the chest (approximately 2 inches)
- Compression Rate: 100-120 compressions per minute
- Ventilation: Use gentler breaths – just enough to make the chest visibly rise
Compression-to-Ventilation Ratios:
- Single Rescuer: 30 compressions to 2 breaths
- Two Healthcare Provider Rescuers: 15 compressions to 2 breaths
Infant CPR (Birth to 1 Year)
Assessment for Infants:
- Check brachial pulse (inside of the upper arm between the elbow and shoulder)
- Tap the infant’s feet or flick the soles to check for responsiveness
- Support the head and neck during positioning
Infant CPR Technique:
- Single Rescuer: Use two fingers placed on the breastbone just below the nipple line
- Two Rescuer: Use two thumbs with hands encircling the chest (preferred method)
- Compression Depth: At least one-third the depth of the chest (approximately 1.5 inches)
- Compression Rate: 100-120 compressions per minute
- Ventilation: Cover both mouth and nose with your mouth, give very gentle puffs
Compression-to-Ventilation Ratios:
- Single Rescuer: 30 compressions to 2 breaths
- Two Healthcare Provider Rescuers: 15 compressions to 2 breaths
Sample Pediatric CPR Questions
Question 3: What is the compression-to-ventilation ratio for two-rescuer infant CPR? a) 30:2
b) 15:2
c) 5:1
d) 3:1
Answer: b) 15:2
Question 4: Where do you check the pulse on an infant? a) Carotid artery
b) Radial artery
c) Brachial artery
d) Femoral artery
Answer: c) Brachial artery
For hands-on practice with pediatric scenarios and age-appropriate mannequins, enroll in our comprehensive BLS certification courses where expert instructors provide personalized feedback.
AED Operation: Automated External Defibrillation
Understanding AED Function
An Automated External Defibrillator (AED) analyzes the heart’s electrical rhythm and delivers a controlled electric shock when appropriate. AEDs are designed to be used by both healthcare providers and lay rescuers, with clear voice prompts guiding users through each step.
Universal AED Steps
Step 1: Power On the AED
- Turn on the AED by pressing the power button or lifting the lid
- Some AEDs automatically power on when the case is opened
- Listen carefully to voice prompts and follow visual instructions
Step 2: Expose and Prepare the Chest
- Remove all clothing from the victim’s chest
- If the chest is wet, dry it with a towel
- Remove any medication patches and wipe the area clean
- Quickly remove excessive chest hair if it prevents proper pad contact
Step 3: Attach AED Pads
- Remove pads from packaging
- Place pads exactly as shown in the diagrams on the pads
- One pad goes on the upper right chest, one on the lower left side
- Press pads firmly to ensure complete skin contact
- Avoid placing pads over implanted devices (place at least 1 inch away)
Step 4: Analyze the Heart Rhythm
- Ensure no one is touching the victim
- Press the analyze button if your AED requires it (many analyze automatically)
- The AED will determine if a shock is advised
- Do not touch the victim during analysis
Step 5: Deliver Shock (if advised)
- If shock is advised, ensure everyone is clear of the victim
- Loudly state “Everyone clear!” and visually check that no one is touching the victim
- Press the shock button when prompted
- Immediately resume CPR starting with chest compressions after the shock
Special AED Considerations
Pediatric Use:
- Children 8 years and older: Use adult pads and adult energy levels
- Children 1-8 years: Use pediatric pads if available; if not, adult pads are acceptable
- Infants: Manual defibrillation is preferred, but AED is acceptable if manual not available
Special Situations:
- Water: Move victim away from puddles; dry chest before applying pads
- Metal Surfaces: Safe to use AED on metal surfaces; electricity will not arc
- Medication Patches: Remove patches and wipe area before pad placement
- Implanted Devices: Place pads at least 1 inch away from device lumps under skin
Sample AED Questions
Question 5: When should you press the shock button on an AED? a) Immediately when the AED is turned on
b) Only when the AED advises a shock and everyone is clear
c) Every 2 minutes during CPR
d) When the victim starts moving
Answer: b) Only when the AED advises a shock and everyone is clear
Question 6: What should you do immediately after the AED delivers a shock? a) Check for a pulse
b) Wait for the victim to wake up
c) Resume CPR starting with compressions
d) Turn off the AED
Answer: c) Resume CPR starting with compressions
Choking Relief: Airway Obstruction Management
Recognizing Severe Airway Obstruction
Quick recognition of choking is critical for effective intervention. Look for these universal signs:
Signs of Severe Choking:
- Unable to speak, cry, or make vocal sounds
- Weak, ineffective cough or no cough at all
- High-pitched squeaking sounds when trying to breathe
- Obvious difficulty breathing with increased effort
- Bluish skin color (cyanosis) around lips and face
- Universal choking sign: hands clutching the throat
Adult and Child Choking Relief (1 Year and Older)
For Conscious Choking Victims:
- Assess and Ask: “Are you choking? Can you speak?”
- Position Yourself: Stand behind the victim with one foot slightly in front for stability
- Give Back Blows: Lean the victim forward and give up to 5 sharp back blows between the shoulder blades with the heel of your hand
- Perform Abdominal Thrusts: Place your arms around the victim’s waist, make a fist with one hand and place it just above the navel, grasp your fist with your other hand and give up to 5 quick upward and inward thrusts
- Alternate: Continue alternating between 5 back blows and 5 abdominal thrusts until the object is expelled or the victim becomes unconscious
Abdominal Thrust Technique:
- Position hands just above the navel, well below the breastbone
- Make quick, upward and inward thrusts
- Each thrust should be separate and distinct
- Use enough force to attempt to dislodge the object
For Unconscious Choking Victims:
- Lower the victim to the ground and begin CPR immediately
- Before giving rescue breaths, open the mouth and look for visible objects
- If you see an object, remove it with your finger
- Never perform blind finger sweeps
- Give rescue breaths even if you suspect choking – CPR may help dislodge the object
Infant Choking Relief (Under 1 Year)
For Conscious Choking Infants:
- Position the Infant: Hold the infant face-down along your forearm, supporting the head and jaw with your hand
- Give Back Blows: Using the heel of your hand, give up to 5 firm back blows between the infant’s shoulder blades
- Reposition: Turn the infant face-up on your forearm, supporting the head
- Give Chest Thrusts: Using two fingers, give up to 5 chest thrusts on the lower half of the breastbone
- Alternate: Continue alternating between back blows and chest thrusts until object is expelled or infant becomes unconscious
Critical Safety Notes:
- Never use abdominal thrusts on infants – use chest thrusts instead
- Support the infant’s head and neck at all times
- Keep the infant’s head lower than the chest during back blows
Sample Choking Questions
Question 7: What is the first step when you encounter an adult who appears to be choking? a) Immediately start back blows
b) Call 911
c) Ask “Are you choking?”
d) Position them on the ground
Answer: c) Ask “Are you choking?”
Question 8: How do you relieve choking in a conscious infant? a) Abdominal thrusts only
b) Back blows only
c) Alternate back blows and chest thrusts
d) Turn upside down and shake
Answer: c) Alternate back blows and chest thrusts
Practice these choking relief techniques with proper mannequins and receive expert guidance in our hands-on BLS training courses.
Chain of Survival: Understanding the Critical Sequence
Adult Chain of Survival
The Chain of Survival represents the ideal sequence of events that maximizes the chance of survival from cardiac arrest. Each link is critical, and weakness in any link reduces the likelihood of survival.
Link 1: Early Recognition and Activation of Emergency Response
- Recognize signs of cardiac arrest quickly
- Call 911 immediately or have someone else call
- Request an AED if available
- Early activation ensures advanced help is on the way
Link 2: Early High-Quality CPR
- Begin chest compressions immediately
- Focus on high-quality technique: proper rate, depth, and recoil
- Minimize interruptions to maintain blood flow
- Continue until AED arrives or EMS takes over
Link 3: Rapid Defibrillation
- Apply AED as soon as it becomes available
- Follow device prompts exactly
- Minimize time between stopping compressions and delivering shock
- Resume CPR immediately after shock delivery
Link 4: Effective Advanced Life Support
- Professional emergency medical care
- Advanced airway management and medication administration
- Continued high-quality CPR during transport
- Rapid transport to appropriate medical facility
Link 5: Integrated Post-Cardiac Arrest Care
- Specialized hospital-based care
- Targeted temperature management
- Coronary intervention when appropriate
- Neurological support and rehabilitation
Pediatric Chain of Survival
The pediatric chain reflects that many pediatric cardiac arrests are preventable and often result from respiratory problems:
- Prevention of Arrest – injury prevention and rapid treatment of respiratory problems
- Early High-Quality CPR – immediate bystander response
- Rapid Activation of Emergency Response – quick access to emergency care
- Effective Advanced Life Support – pediatric-specific protocols
- Integrated Post-Cardiac Arrest Care – family-centered care approach
Understanding your role in the Chain of Survival helps you appreciate how your BLS skills contribute to the victim’s overall chance of survival.
Team-Based Resuscitation and Communication
Essential Team Roles
Effective resuscitation requires coordinated teamwork with clearly defined roles:
Team Leader:
- Assigns specific roles to team members
- Monitors overall resuscitation quality
- Makes treatment decisions and calls for interventions
- Coordinates with incoming EMS personnel
- Maintains situational awareness
Primary Compressor:
- Provides continuous, high-quality chest compressions
- Counts compressions aloud to maintain rhythm
- Communicates when becoming fatigued
- Switches with backup compressor every 2 minutes
Airway Manager:
- Maintains proper head position and airway opening
- Provides rescue breaths with appropriate timing
- Monitors chest rise and ventilation effectiveness
- May assist with advanced airway placement
AED Operator:
- Operates AED safely and efficiently
- Ensures area is clear during rhythm analysis and shock delivery
- Coordinates timing with CPR team
- Announces shock delivery and resumes CPR timing
Effective Communication Principles
Closed-Loop Communication:
- Team leader gives clear, specific instructions
- Team member acknowledges instruction by repeating it back
- Team member performs the task
- Team member reports when task is completed
Example Communication Sequence:
- Team Leader: “Start compressions”
- Compressor: “Starting compressions” (begins chest compressions)
- Team Leader: “Prepare the AED”
- AED Operator: “Preparing AED” (gets AED ready)
- AED Operator: “AED ready for use”
Communication Best Practices:
- Speak clearly and calmly despite the emergency
- Use specific, unambiguous language
- Ask for clarification if instructions are unclear
- Maintain professional demeanor to reduce stress
Sample Team-Based Questions
Question 9: How often should compressors switch during team CPR? a) Every minute
b) Every 2 minutes or 5 cycles
c) Every 5 minutes
d) Only when tired
Answer: b) Every 2 minutes or 5 cycles
Question 10: What is closed-loop communication? a) Speaking quietly during emergencies
b) Only the team leader speaks
c) Confirming instructions by repeating them back
d) Using hand signals instead of talking
Answer: c) Confirming instructions by repeating them back
Components of High-Quality CPR
Critical Quality Metrics
High-quality CPR significantly improves survival rates. Focus on these essential components:
Compression Rate:
- Maintain 100-120 compressions per minute
- Use a metronome or music with appropriate tempo
- Count compressions aloud to maintain rhythm
- Avoid going too fast, which reduces compression depth
Compression Depth:
- Adults: At least 2 inches, no more than 2.4 inches
- Children: At least one-third chest depth (about 2 inches)
- Infants: At least one-third chest depth (about 1.5 inches)
- Push hard enough to create blood flow
Complete Chest Recoil:
- Allow chest to return completely to normal position
- Do not lean on the chest between compressions
- Complete recoil allows heart to refill with blood
- Incomplete recoil reduces blood flow significantly
Minimize Interruptions:
- Limit pauses in compressions to less than 10 seconds
- Continue compressions during AED charging when possible
- Avoid frequent pulse checks
- Coordinate team actions to reduce downtime
Avoid Excessive Ventilation:
- Give breaths slowly over 1 second each
- Watch for chest rise but avoid over-inflation
- Too much air causes gastric inflation and reduces blood return
- Focus more on compressions than ventilations
Common CPR Mistakes to Avoid
Compression Errors:
- Incorrect hand placement (too high or too low on chest)
- Insufficient compression depth
- Compressing too fast or too slow
- Not allowing complete chest recoil
- Taking too many or too long breaks
Ventilation Errors:
- Giving breaths too quickly or forcefully
- Inadequate head tilt and chin lift
- Poor mask seal allowing air to escape
- Ventilating too frequently (more than 30:2 ratio)
Regular practice and feedback are essential for maintaining high-quality CPR skills throughout your certification period.
Comprehensive Practice Questions
Test your understanding with these essential BLS knowledge questions:
Question 11: What is the correct sequence for single-rescuer adult CPR? a) Check pulse, call 911, start compressions
b) Call 911, check pulse, start CPR
c) Check responsiveness, call 911, check pulse, start CPR
d) Start CPR immediately, then call 911
Answer: c) Check responsiveness, call 911, check pulse, start CPR
Question 12: When using an AED on a child, you should: a) Always use adult pads
b) Use pediatric pads if available, adult pads if not
c) Never use an AED on children
d) Only use manual defibrillators
Answer: b) Use pediatric pads if available, adult pads if not
Question 13: The proper compression rate for CPR is: a) 80-100 compressions per minute
b) 100-120 compressions per minute
c) 120-140 compressions per minute
d) As fast as possible
Answer: b) 100-120 compressions per minute
Question 14: What should you do if you see a medication patch on a victim’s chest before applying AED pads? a) Leave it alone and place pads normally
b) Remove the patch and wipe the area clean
c) Place pads over the patch
d) Do not use the AED
Answer: b) Remove the patch and wipe the area clean
Question 15: In two-rescuer CPR for an infant, what is the preferred compression technique? a) Two fingers on the breastbone
b) One hand on the breastbone
c) Two thumbs with hands encircling the chest
d) Two hands as in adult CPR
Answer: c) Two thumbs with hands encircling the chest
Question 16: How long should you check for breathing in an unconscious victim? a) No more than 5 seconds
b) No more than 10 seconds
c) 15-20 seconds
d) Until you’re certain
Answer: b) No more than 10 seconds
Question 17: What is the most important factor in successful resuscitation? a) Speed of response
b) High-quality chest compressions
c) Rescue breathing
d) AED availability
Answer: b) High-quality chest compressions
Question 18: When should you stop CPR? a) After 10 minutes if no response
b) When EMS arrives and takes over
c) When you get tired
d) If the victim doesn’t wake up immediately
Answer: b) When EMS arrives and takes over
For additional practice questions and detailed explanations, try our free BLS sample test to assess your readiness.
Quick Reference Guide
CPR Summary by Age Group
Adults:
- Compression depth: 2-2.4 inches
- Compression rate: 100-120/min
- Ratio: 30:2 (single and two-rescuer)
- Pulse check: Carotid artery
Children (1 year to puberty):
- Compression depth: At least 1/3 chest depth (~2 inches)
- Compression rate: 100-120/min
- Ratio: 30:2 (single rescuer), 15:2 (two rescuer)
- Pulse check: Carotid or femoral artery
Infants (birth to 1 year):
- Compression depth: At least 1/3 chest depth (~1.5 inches)
- Compression rate: 100-120/min
- Ratio: 30:2 (single rescuer), 15:2 (two rescuer)
- Pulse check: Brachial artery
AED Quick Steps
- Power on AED
- Expose chest and attach pads
- Ensure everyone is clear
- Press analyze (if required)
- Press shock (if advised)
- Resume CPR immediately
Choking Relief Summary
- Adults/Children: Back blows and abdominal thrusts
- Infants: Back blows and chest thrusts (no abdominal thrusts)
- Unconscious victims: Begin CPR, look for objects before breaths
Prepare for Success in Your BLS Course
You now have the essential knowledge foundation needed to excel in your BLS certification course. This study guide covers all the core competencies you’ll be tested on, from high-quality CPR techniques to proper AED operation and effective choking relief. Understanding these concepts before your class will help you focus on perfecting your hands-on skills and building the muscle memory essential for real emergency situations.
The skills you’re about to learn have the power to save lives in your workplace, community, and family. Every year, effective bystander CPR doubles or triples a cardiac arrest victim’s chance of survival. When you complete your certification, you join a community of trained responders ready to act when seconds count.
Ready to put this knowledge into practice? Register for your BLS certification class today and take advantage of our expert instruction, small class sizes, and hands-on learning environment. Our American Heart Association certified instructors at Pulse CPR and First Aid School are committed to ensuring every student gains the confidence and competence to respond effectively in emergency situations. Don’t wait – the life you save could be someone you love.
Contact us at (706) 901-7277 or visit pulsecprschool.com to schedule your certification course. We serve communities throughout Georgia with convenient locations and flexible scheduling options.
Disclaimer: This study guide is designed to supplement official American Heart Association BLS training materials and instructor-led courses. Successful completion of a hands-on BLS course with certified instructors is required for official certification. Information is based on current AHA guidelines and may be updated as new research becomes available.