Heartsaver First Aid CPR AED Study Guide
The Ultimate Comprehensive Preparation Guide for American Heart Association Heartsaver Certification
About This Study Guide
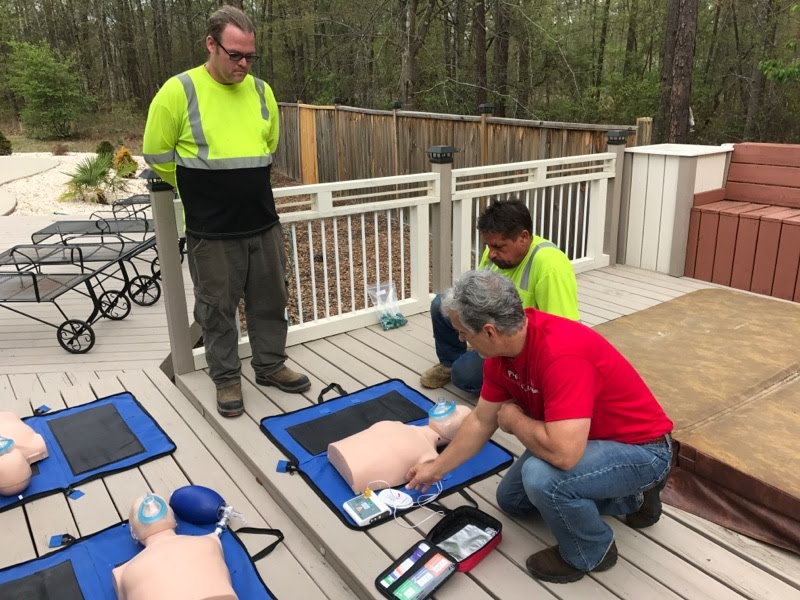
Welcome to your comprehensive study guide for the American Heart Association Heartsaver First Aid CPR AED course. This guide is designed to help you prepare for your certification through Pulse CPR School, your trusted training partner in Martinez, GA.
Contact Pulse CPR School:
- Phone: 706-901-7277
- Address: 110 Davis Road Suite #18, Martinez, GA 30907
- Email: pulsecpr967@gmail.com
- Website: pulsecprschool.com
Table of Contents
- Course Overview
- Legal and Ethical Foundations
- Scene Safety and Assessment
- Personal Protective Equipment
- Medical Emergencies
- Adult CPR and AED
- Child CPR and AED
- Infant CPR
- Choking Relief Techniques
- Bleeding Control and Wound Care
- Shock Recognition and Treatment
- Burns and Thermal Injuries
- Environmental Emergencies
- Poisoning and Overdose
- Bone, Joint, and Muscle Injuries
- Head, Neck, and Spinal Injuries
- Breathing Emergencies
- Cardiac Emergencies
- Neurological Emergencies
- Behavioral Emergencies
- Special Populations
- Emergency Childbirth
- Disaster Response Basics
- Practice Scenarios
- Comprehensive Practice Test
Course Overview
The Heartsaver First Aid CPR AED course teaches critical skills needed to respond to and manage illnesses and injuries in the first few minutes until emergency medical services (EMS) arrives. This certification is ideal for anyone with little or no medical training who needs a course completion card for their job, regulatory requirements, or personal development.
Course Objectives
Upon successful completion, students will be able to:
- Describe the importance of high-quality CPR and its impact on survival
- Describe all steps of the Chain of Survival and apply the BLS concepts
- Recognize the signs of someone needing CPR
- Perform high-quality CPR for adults, children, and infants
- Describe the importance of early use of an AED and demonstrate its use
- Provide effective ventilations using a barrier device
- Describe the importance of teams in multirescuer resuscitation
- Perform as an effective team member during multirescuer CPR
- Describe the technique for relief of foreign-body airway obstruction
- Provide first aid in emergency situations
Ready to get certified? View our First Aid CPR classes or browse all available classes. Contact Pulse CPR School at 706-901-7277 to register today!
Chapter 1: Legal and Ethical Foundations
Duty to Act
Understanding when you have a legal or moral obligation to provide assistance:
Legal Duty to Act:
- Healthcare professionals on duty
- Lifeguards while working
- Some jurisdictions require assistance if safe to do so
Moral Duty to Act:
- Helping family members and friends
- Assisting when you have special training
- Acting when no one else is available
Good Samaritan Laws
Protection for individuals who provide reasonable assistance:
Coverage Includes:
- Acting in good faith
- Not exceeding your training level
- Not accepting payment for emergency care
- Acting within reasonable standards
Coverage Does NOT Include:
- Gross negligence or intentional misconduct
- Acting beyond your scope of training
- Abandoning care once started
- Moving someone unnecessarily
Consent and Refusal
Implied Consent:
- Unconscious or unresponsive victims
- Minors without parents present
- Confused or altered mental state
Expressed Consent:
- Conscious, alert adults
- Must explain what you plan to do
- Respect refusal of care
Special Considerations:
- Mental illness does not automatically negate consent
- Intoxicated individuals may not be able to consent
- Parents/guardians consent for minors
Documentation and Reporting
Important to Document:
- Time and location of incident
- Condition of victim when found
- Care provided
- Changes in victim’s condition
- Time EMS arrived
Sample Questions:
- When do Good Samaritan Laws protect you?
- What is the difference between implied and expressed consent?
- List three situations where you would have a legal duty to act.
- Can an intoxicated person refuse medical care?
Looking for professional training? Pulse CPR School at 110 Davis Road Suite #18, Martinez, GA 30907 offers company group training for healthcare facilities and businesses.
Chapter 2: Scene Safety and Assessment
Primary Scene Assessment
The 5 S’s of Scene Safety:
- Scene – Is it safe?
- Situation – What happened?
- Spinal – Consider spinal injury?
- Send – Call for help?
- Start – Begin first aid?
Environmental Hazards
Traffic Hazards:
- Position yourself between traffic and victim when possible
- Use hazard lights and reflective triangles
- Consider moving victim only if immediate danger
Fire and Explosion Risks:
- Electrical fires – never use water
- Chemical fires – special extinguishing agents needed
- Vehicle fires – risk of explosion
Electrical Hazards:
- Downed power lines – assume all are live
- Water and electricity – deadly combination
- Turn off power at source when possible
Hazardous Materials:
- Chemical spills and leaks
- Biological hazards (blood, bodily fluids)
- Radioactive materials
- Unknown substances
Structural Hazards:
- Building collapse potential
- Unstable surfaces
- Glass and sharp objects
- Confined spaces
Crime Scene Considerations
- Preserve evidence when possible
- Work with law enforcement
- Document carefully
- Protect yourself from violence
Multiple Victim Situations
Triage Priorities:
- Red (Immediate) – Life-threatening but treatable
- Yellow (Delayed) – Serious but not immediately life-threatening
- Green (Minor) – Walking wounded
- Black (Deceased/Expectant) – No signs of life or unsurvivable injuries
Sample Questions:
- What are the 5 S’s of scene safety?
- When should you move an injured person?
- How do you handle a scene with downed power lines?
- What are the four triage categories?
Chapter 3: Personal Protective Equipment (PPE)
Standard Precautions
Treat all blood and bodily fluids as potentially infectious:
Universal Precautions Include:
- Blood
- Semen and vaginal secretions
- Cerebrospinal fluid
- Synovial fluid
- Pleural fluid
- Any fluid with visible blood
- Saliva in dental procedures
Types of PPE
Gloves:
- Latex (if no allergies)
- Nitrile (latex-free option)
- Vinyl (temporary use)
- Change between patients
- Remove carefully to avoid contamination
Eye Protection:
- Safety glasses
- Face shields
- Goggles
- Protection from splashes and sprays
Masks and Respirators:
- Surgical masks for droplet protection
- N95 respirators for airborne pathogens
- Proper fit testing essential
Protective Clothing:
- Gowns or coveralls
- Shoe covers
- Hair covers when indicated
Proper PPE Sequence
Putting On (Donning):
- Hand hygiene
- Gown
- Mask or respirator
- Eye protection
- Gloves
Taking Off (Doffing):
- Gloves
- Eye protection
- Gown
- Mask or respirator
- Hand hygiene
Hand Hygiene
When to Wash Hands:
- Before and after patient contact
- After removing gloves
- After touching contaminated surfaces
- Before eating or drinking
Proper Technique:
- Use soap and water for 20 seconds
- Alcohol-based sanitizer when soap unavailable
- Cover all surfaces of hands and fingers
Barrier Devices for Rescue Breathing
- Face shields
- Pocket masks
- Bag-mask devices
- One-way valve systems
Sample Questions:
- What bodily fluids require universal precautions?
- What is the correct order for putting on PPE?
- When should you perform hand hygiene?
- What type of gloves should you avoid if someone has latex allergies?
Need hands-on PPE training? Contact Pulse CPR School at 706-901-7277 or visit us at 110 Davis Road Suite #18, Martinez, GA 30907 for comprehensive safety training.
Chapter 4: Medical Emergencies
Cardiovascular Emergencies
Heart Attack (Myocardial Infarction):
Classic Signs and Symptoms:
- Chest pain or discomfort (pressure, squeezing, fullness)
- Pain radiating to arms, back, neck, jaw, or stomach
- Shortness of breath
- Nausea or vomiting
- Lightheadedness or fainting
- Cold sweats
- Unusual fatigue (especially in women)
Atypical Presentations (especially women, elderly, diabetics):
- Jaw pain
- Back pain
- Extreme fatigue
- Shortness of breath without chest pain
- Nausea and vomiting
Treatment:
- Call 9-1-1 immediately
- Help person sit comfortably
- Loosen tight clothing
- Assist with prescribed nitroglycerin
- Give aspirin if not allergic (chew, don’t swallow)
- Monitor breathing and pulse
- Be prepared to perform CPR
Angina:
- Chest pain due to reduced blood flow
- Usually triggered by exertion or stress
- Relieved by rest and nitroglycerin
- May precede heart attack
Stroke and TIA
Types of Stroke:
- Ischemic (87%) – Blood clot blocks artery
- Hemorrhagic (13%) – Blood vessel ruptures
- TIA – Temporary blockage, “mini-stroke”
F.A.S.T. Assessment:
- Face drooping – Ask to smile
- Arm weakness – Ask to raise both arms
- Speech difficulty – Ask to repeat simple phrase
- Time – Note time symptoms started
Additional Signs:
- Sudden severe headache
- Loss of balance or coordination
- Sudden vision loss
- Confusion
- Numbness on one side
BE-FAST (Extended Assessment):
- Balance – Loss of coordination
- Eyes – Vision changes
- Face drooping
- Arm weakness
- Speech difficulty
- Time
Treatment:
- Call 9-1-1 immediately
- Note time symptoms started
- Keep person comfortable
- Do not give food or water
- Monitor breathing
- Position on affected side if unconscious
Respiratory Emergencies
Asthma Attack:
Triggers:
- Allergens (dust, pollen, pet dander)
- Irritants (smoke, strong odors)
- Exercise
- Weather changes
- Emotional stress
- Respiratory infections
Signs and Symptoms:
- Wheezing
- Shortness of breath
- Chest tightness
- Coughing
- Anxiety
- Use of accessory muscles
- Peak flow below personal best
Treatment:
- Help person sit upright
- Assist with prescribed inhaler
- Encourage slow, deep breaths
- Remove triggers if possible
- Call 9-1-1 if severe or not improving
Hyperventilation:
- Rapid, shallow breathing
- Often anxiety-related
- May cause dizziness, tingling
- Treatment: encourage slow breathing, reassurance
Allergic Reactions
Mild to Moderate Reactions:
- Skin redness, rash, hives
- Itching
- Swelling (localized)
- Runny nose, sneezing
Severe Reactions (Anaphylaxis):
- Difficulty breathing
- Swelling of face, lips, tongue, throat
- Rapid, weak pulse
- Dizziness or fainting
- Widespread rash
- Nausea, vomiting, diarrhea
Treatment for Anaphylaxis:
- Call 9-1-1 immediately
- Help with epinephrine auto-injector if available
- Keep person lying down with legs elevated
- Monitor breathing and pulse
- Be prepared for second reaction
- Transport even if symptoms improve
Common Allergens:
- Foods (nuts, shellfish, eggs, milk)
- Medications (antibiotics, aspirin)
- Insect stings
- Latex
- Environmental (pollen, dust)
Diabetic Emergencies
Hypoglycemia (Low Blood Sugar):
Causes:
- Too much insulin
- Skipped meals
- Excessive exercise
- Alcohol consumption
Signs and Symptoms:
- Shakiness, trembling
- Sweating
- Rapid heart rate
- Anxiety, irritability
- Confusion
- Dizziness
- Hunger
- Weakness
Treatment:
- Give sugar if conscious and able to swallow
- Orange juice, regular soda, glucose tablets
- Recheck in 15 minutes
- Call 9-1-1 if unconscious or not improving
Hyperglycemia (High Blood Sugar):
Signs and Symptoms:
- Excessive thirst
- Frequent urination
- Fruity breath odor
- Nausea, vomiting
- Confusion
- Rapid breathing
Treatment:
- Call 9-1-1
- Do not give sugar
- Monitor breathing
- Keep person comfortable
Seizure Disorders
Types of Seizures:
- Generalized Tonic-Clonic – Full body convulsions
- Absence – Brief loss of awareness
- Focal – Localized to one area
- Status Epilepticus – Prolonged or repeated seizures
Seizure First Aid:
- Keep person safe
- Clear area of hazards
- Time the seizure
- Turn on side after convulsions stop
- Stay with person until fully alert
- Call 9-1-1 if:
- First seizure
- Lasts longer than 5 minutes
- Repeated seizures
- Injury occurs
- Person doesn’t return to normal
DO NOT:
- Put anything in person’s mouth
- Hold person down
- Give water or food until fully alert
Sample Questions:
- What does F.A.S.T. stand for in stroke assessment?
- When should you assist someone with their epinephrine auto-injector?
- What are the signs of hypoglycemia?
- When should you call 9-1-1 for a seizure?
- List three atypical heart attack symptoms in women.
Want comprehensive medical emergency training? Visit Pulse CPR School’s classes or call 706-901-7277 to enroll in our expert-led courses.
Chapter 5: Adult CPR and AED
When to Start CPR
Indications for CPR:
- Unresponsive to verbal and physical stimuli
- No normal breathing (absent or only gasping)
- No detectable pulse (if trained to check)
Agonal Breathing:
- Irregular, gasping breaths
- Not effective breathing
- Sign of cardiac arrest
- Start CPR immediately
High-Quality CPR Components
Compression Technique:
- Rate: 100-120 compressions per minute
- Depth: At least 2 inches (5 cm) but no more than 2.4 inches (6 cm)
- Location: Lower half of breastbone (sternum)
- Hand Position: Heel of one hand, other hand on top, fingers interlaced
- Body Position: Shoulders directly over hands, arms straight
- Release: Allow complete chest recoil between compressions
- Interruptions: Minimize to less than 10 seconds
Ventilation Technique:
- Volume: Each breath should make chest rise visibly
- Duration: 1 second per breath
- Rate: 2 breaths after every 30 compressions
- Avoid: Excessive ventilation (too fast, too much volume)
Detailed CPR Steps
1. Scene Safety and Recognition:
- Ensure scene is safe
- Check responsiveness (tap shoulders, shout)
- Look for normal breathing (10 seconds maximum)
- Call 9-1-1 and request AED
2. Positioning:
- Place person on firm, flat surface
- Kneel beside chest
- Tilt head back, lift chin
- Remove any visible airway obstruction
3. Hand Placement:
- Locate lower half of breastbone
- Place heel of one hand on sternum
- Place other hand on top, interlace fingers
- Keep fingers off ribs
4. Compressions:
- Push hard and fast
- At least 2 inches deep
- Allow complete recoil
- Count aloud: “1 and 2 and 3…”
- Minimize interruptions
5. Airway and Breathing:
- Open airway (head-tilt, chin-lift)
- Create seal over mouth
- Give 2 breaths, 1 second each
- Watch for chest rise
6. Continue CPR:
- 30 compressions : 2 breaths
- Switch rescuers every 2 minutes
- Continue until EMS takes over
AED Operation
AED Setup:
- Turn on AED (follow voice prompts)
- Attach pads to bare, dry chest
- Adult pads: upper right chest, lower left side
- Ensure pads don’t touch each other
- Connect cables if necessary
Special Situations:
- Water: Move to dry area, dry chest
- Medication Patches: Remove and wipe skin
- Pacemaker/ICD: Place pads 1 inch away from device
- Hairy Chest: Shave or use extra pads to remove hair
- Metal Surfaces: Move person if possible
AED Analysis and Shock:
- Ensure no one is touching person
- Press analyze button if required
- AED will determine if shock is needed
- If shock advised, ensure area is clear
- Press shock button
- Immediately resume CPR
Two-Rescuer CPR
Roles:
- Rescuer 1: Compressions
- Rescuer 2: Airway and breathing
Switch Procedure:
- Switch every 2 minutes or when compressor becomes fatigued
- Switch should take less than 5 seconds
- Continuing rescuer counts “1, 2, 3, 4, 5” during switch
Special Considerations
Pregnancy (Advanced):
- Displace uterus to left
- May require additional rescuer
- Transport immediately
Hypothermia:
- May need prolonged resuscitation
- Rewarm gradually
- “Not dead until warm and dead”
Drug Overdose:
- Consider naloxone (Narcan) if available and trained
- Continue CPR as indicated
- Multiple doses may be needed
Recovery Position
When to Use:
- Person is breathing but unconscious
- No suspected spinal injury
- To maintain open airway
Technique:
- Extend arm nearest you above head
- Roll person toward you onto side
- Bend top leg for stability
- Tilt head back to open airway
- Monitor breathing continuously
Sample Questions:
- What is the correct compression rate for adult CPR?
- How deep should adult chest compressions be?
- What ratio of compressions to breaths is used in adult CPR?
- When should AED pads be placed at least 1 inch away from a device?
- How often should rescuers switch during CPR?
- What should you do if you see agonal breathing?
Ready to practice these life-saving skills? Contact Pulse CPR School at 706-901-7277 or visit our website at pulsecprschool.com to register for hands-on training.
Chapter 6: Child CPR and AED (Ages 1-8 Years)
Anatomical Differences in Children
Key Differences:
- Smaller airway, easily blocked
- Larger head relative to body
- Chest wall more compliant
- Less blood volume
- Faster respiratory and heart rates
- Different causes of cardiac arrest
When to Start Child CPR
Same criteria as adults:
- Unresponsive
- No normal breathing or only gasping
- No pulse (if trained to check)
Child CPR Technique
Hand Position Options:
- Preferred: Heel of one hand on lower half of breastbone
- Alternative: Two hands (same as adult) for larger children
- Keep other hand on forehead to maintain airway
Compression Specifications:
- Depth: At least 1/3 depth of chest (approximately 2 inches/5 cm)
- Rate: 100-120 compressions per minute
- Location: Lower half of breastbone
- Ratio: 30 compressions to 2 breaths (single rescuer)
Two-Rescuer Child CPR:
- Ratio: 15 compressions to 2 breaths
- Technique: Two-thumb encircling hands method (for small children)
- Switch every 2 minutes
Airway Management
Head-Tilt, Chin-Lift:
- Less head tilt than adults
- Avoid overextension of neck
- Use jaw-thrust if spinal injury suspected
Breathing:
- Mouth-to-mouth or barrier device
- Smaller breaths than for adults
- Just enough to make chest rise
- Avoid excessive ventilation
Child AED Use
AED Considerations:
- Use pediatric pads if available (ages 1-8)
- If only adult pads available, may use but ensure they don’t touch
- Some AEDs have pediatric key or switch
- Follow same steps as adult AED use
Pad Placement:
- Pediatric pads: Follow pictures on pads
- Adult pads on child: Front and back placement if pads would touch on chest
Common Causes of Pediatric Emergencies
Respiratory Causes (Most Common):
- Airway obstruction
- Asthma
- Drowning
- Suffocation
- Respiratory infections
Cardiac Causes (Less Common):
- Congenital heart defects
- Drug ingestion
- Electrocution
- Severe hypothermia
Age-Specific Considerations
Toddlers (1-3 years):
- May be fearful of strangers
- Separation anxiety from parents
- Limited ability to describe symptoms
- Rapid respiratory rate normal
Preschool (3-5 years):
- Can follow simple instructions
- May have magical thinking about illness
- Can point to pain location
- Still fearful of procedures
School Age (5-8 years):
- Can describe symptoms
- Understand cause and effect
- May be embarrassed by attention
- Concerned about permanent damage
Prevention Education
Injury Prevention:
- Proper car seat and booster seat use
- Helmet use for bikes, skates, scooters
- Water safety and supervision
- Poison prevention and childproofing
- Fire safety and escape plans
Sample Questions:
- What is the compression depth for children?
- What is the compression-to-breath ratio for single-rescuer child CPR?
- What is the compression-to-breath ratio for two-rescuer child CPR?
- Can adult AED pads be used on children?
- What are the most common causes of cardiac arrest in children?
- How should you modify head-tilt for children compared to adults?
Need specialized pediatric training? Pulse CPR School offers comprehensive CPR classes including pediatric scenarios. Call 706-901-7277 to learn more.
Chapter 7: Infant CPR (Under 1 Year)
Infant Anatomical Considerations
Unique Characteristics:
- Very small airway (size of drinking straw)
- Large occiput (back of head)
- Obligate nose breathers initially
- Rapid heat loss
- Limited glycogen stores
- Immature immune system
Recognition of Cardiac Arrest
Signs in Infants:
- Unresponsive to stimulation
- No normal breathing or only gasping
- No palpable pulse (brachial artery)
- Cyanosis (blue color) around lips, face
Infant CPR Technique
Hand Position:
- Two-finger technique: Index and middle fingers on lower half of breastbone
- Two-thumb technique: Thumbs on sternum, hands encircling chest (two rescuers)
- Place fingers just below nipple line
- Avoid xiphoid process (bottom tip of breastbone)
Compression Specifications:
- Depth: At least 1/3 depth of chest (approximately 1.5 inches/4 cm)
- Rate: 100-120 compressions per minute
- Ratio: 30:2 (single rescuer), 15:2 (two rescuers)
- Technique: Push straight down, allow complete recoil
Airway Management:
- Head position: Neutral position (not tilted back)
- Mouth seal: Cover mouth and nose with your mouth
- Breath size: Small puffs, just enough to make chest rise
- Duration: 1 second per breath
Two-Rescuer Infant CPR
Two-Thumb Encircling Hands Technique:
- Thumbs on lower half of breastbone
- Fingers encircle chest and support back
- Compress with thumbs
- More effective than two-finger technique
- Ratio: 15 compressions to 2 breaths
Infant AED Use
Current Recommendations:
- AED use not recommended for infants under 1 year
- Manual CPR preferred
- If AED is only option available, may be used with pediatric pads
- Never delay manual CPR to search for AED
Special Infant Situations
Newborn Resuscitation (First 24 hours):
- Specialized protocols apply
- Focus on ventilation first
- Different compression technique
- Requires advanced training
SIDS (Sudden Infant Death Syndrome):
- Sudden, unexplained death of infant
- Begin CPR immediately
- May be emotionally traumatic scene
- Support for family important
Submersion/Drowning:
- Focus on ventilation
- Begin rescue breathing immediately
- Hypothermia may be protective
- Continue efforts even if prolonged submersion
Positioning for Care
Carrying Position:
- Support head and neck
- Keep airway aligned
- Minimize movement during CPR
- Use firm surface for compressions
Recovery Position for Infants:
- Hold in arms with head slightly lower than chest
- Support head and neck
- Turn to side if vomiting occurs
- Monitor breathing continuously
Common Infant Emergencies
Respiratory Distress:
- Nasal flaring
- Retractions (chest pulling in)
- Grunting sounds
- Rapid breathing (over 60/minute at rest)
- Color changes
Fever in Infants:
- Rectal temp over 100.4°F (38°C)
- Under 3 months: medical emergency
- May cause febrile seizures
- Risk of serious bacterial infection
Dehydration:
- Fewer wet diapers
- Sunken fontanelle (soft spot)
- Dry mouth and tongue
- Lethargy or irritability
- Skin tenting
Choking Prevention
Safe Sleep Guidelines:
- Back to sleep
- Firm sleep surface
- No loose bedding, toys, bumpers
- Room sharing without bed sharing
- Avoid smoke exposure
Feeding Safety:
- Age-appropriate foods
- Supervise all eating
- Avoid small, hard objects
- Cut foods appropriately
- No honey before 1 year
Sample Questions:
- What fingers do you use for infant chest compressions?
- How deep should infant compressions be?
- What is the compression-to-breath ratio for single-rescuer infant CPR?
- Should you use an AED on an infant under 1 year?
- How should you position an infant’s head for rescue breathing?
- What is the two-thumb encircling hands technique?
- At what age is SIDS most common?
Want hands-on infant CPR training? Pulse CPR School at 110 Davis Road Suite #18, Martinez, GA 30907 provides comprehensive infant CPR classes. Call 706-901-7277 today!
Chapter 8: Choking Relief Techniques
Recognition of Choking
Universal Choking Sign:
- Hands clutched to throat
- Unable to speak or cough effectively
- High-pitched sounds or no sounds
- Difficulty breathing
- Blue coloration around lips, face
Partial vs. Complete Obstruction:
- Partial: Can speak, cough forcefully, breathe
- Complete: Cannot speak, cough, or breathe effectively
Adult and Child Conscious Choking Relief
Assessment:
- Ask “Are you choking?”
- If they can speak or cough forcefully, encourage coughing
- If they cannot speak or have weak cough, begin choking relief
Abdominal Thrusts (Heimlich Maneuver):
- Stand behind person
- Place arms around waist
- Make fist with one hand
- Place thumb side of fist above navel, below ribcage
- Grasp fist with other hand
- Give quick, upward thrusts
- Continue until object expelled or person becomes unconscious
Back Blows (Alternative technique):
- Stand to side and slightly behind person
- Support chest with one hand
- Lean person forward
- Give 5 sharp blows between shoulder blades with heel of hand
- Check mouth for visible object
- Alternate with abdominal thrusts if trained
Special Populations:
- Pregnant women: Chest thrusts instead of abdominal thrusts
- Obese individuals: Chest thrusts may be more effective
- Self-administered: Use back of chair or similar object
Infant Conscious Choking Relief
Technique:
- Position: Hold infant face down on forearm, supporting jaw
- Back Blows: Give 5 back blows with heel of hand between shoulder blades
- Turn Infant: Support head and neck, turn face up
- Chest Thrusts: Give 5 chest thrusts with 2 fingers on lower breastbone
- Check Mouth: Look for visible object, remove if seen
- Repeat: Continue alternating back blows and chest thrusts
Important Points:
- Support infant’s head lower than chest
- Use heel of hand for back blows
- Use 2 fingers for chest thrusts
- Never perform abdominal thrusts on infants
Unconscious Choking Relief
Adult/Child Unconscious Choking:
- Begin CPR immediately
- Before each set of rescue breaths, look in mouth
- Remove object only if you can see it
- Never perform blind finger sweeps
- Continue CPR until object expelled or EMS arrives
Infant Unconscious Choking:
Use little finger for removal if
Begin infant CPR
Look in mouth before rescue breaths
Remove visible objects carefully
Certification Information
Heartsaver Certification Details
- Valid for 2 years from issue date
- Recognized by American Heart Association
- Meets OSHA and workplace requirements
- Digital and physical cards available
Renewal Requirements
- Complete renewal course before expiration
- Skills demonstration required
- Updated guidelines and techniques covered
Need to renew? Pulse CPR School offers BLS renewal and recertification courses.
Additional Resources
Emergency Numbers
- Emergency Services: 9-1-1
- Poison Control: 1-800-222-1222
- Pulse CPR School: 706-901-7277
Online Resources
- American Heart Association: heart.org
- Red Cross: redcross.org
- OSHA: osha.gov
Local Training
Pulse CPR School serves the Martinez, GA community and surrounding areas with comprehensive CPR and first aid training.
Contact Information:
- Address: 110 Davis Road Suite #18, Martinez, GA 30907
- Phone: 706-901-7277
- Email: pulsecpr967@gmail.com
- Website: pulsecprschool.com
Disclaimer
This study guide is designed to supplement, not replace, official American Heart Association Heartsaver training materials. While every effort has been made to ensure accuracy, guidelines and recommendations may change. Always refer to current AHA guidelines and attend hands-on training for proper certification.
The information provided is for educational purposes only and should not be considered medical advice. In emergency situations, always call 9-1-1 and follow dispatcher instructions.
Pulse CPR School is committed to providing quality, up-to-date training that meets American Heart Association standards. Check our reviews to see what our students say about their experience.
For questions about this study guide or to register for classes, contact Pulse CPR School at 706-901-7277 or visit us at 110 Davis Road Suite #18, Martinez, GA 30907.
Last updated: July 2025 | © 2025 Pulse CPR School | All rights reserved
Keywords: Heartsaver CPR AED, First Aid training, CPR certification, Martinez GA, American Heart Association, emergency response training, workplace safety, CPR classes